
Microsoft released its most recent build for Windows 11 Insiders on the brand-new Canary Channel earlier today.

Microsoft released its most recent build for Windows 11 Insiders on the brand-new Canary Channel earlier today. Introducing SHA-3 support is arguably the new build 25324's most significant accomplishment.
But as is typical, these Insider builds also show off impending, secret modifications that still need to be made public, in addition to the ones that have been publicly publicized. The most recent build is also no exception.
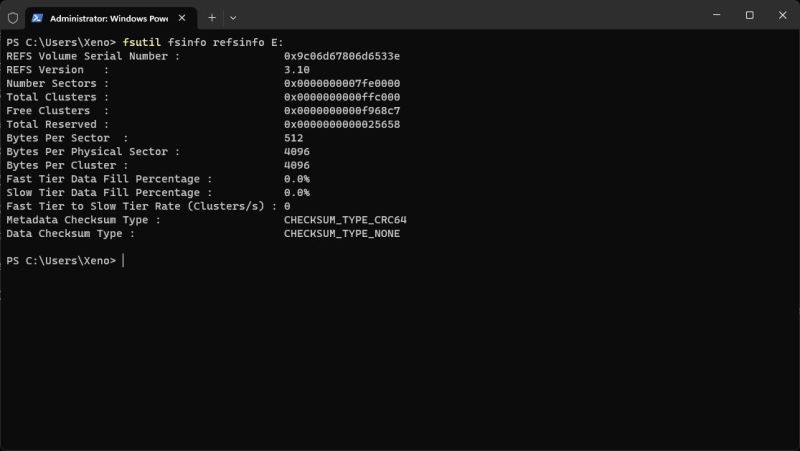
Microsoft has changed the ReFS file system in build 25324 from version 3.9 to version 3.10, as noted by Twitter user Xeno. As a result, ReFS claims, among other advantages over New Technology File System or NTFS, more resilience, improved performance on virtual machines (VMs), and better data size support (up to 35PB vs. 256TB on NTFS).
In case you are unaware, Microsoft has been working to make Windows 11 support for ReFS a reality. In addition, the business is working on enabling the capability, which is still hidden and needs a unique velocity ID, allowing OS installations on ReFS volumes as well.
Read Also: The Galaxy Z Fold 5 May Be The First Foldable, Dust-Resistant Phone Ever Made
Additionally, Microsoft is introducing the capability to create Developer Volumes based on ReFS from within the Settings app. (which has seen many improvements lately). These Dev Drives will serve as developer environments and let programmers create virtual hard disks (VHD).
ReFS-based VHD/VHDx developer volumes are much better now because the file system is designed to accelerate VMs. The Dev Drives can be enabled in this most recent Canary build using ViveTool. (latest version 0.3.3).
The updated form now includes a new "Dynamic Developer Volume" and the old "Developer Volumes." The steps listed below can be used to enable these using velocity IDs:
- Download ViveTool from GitHub, then unpack the files in a practical location.
- Click Win + X, and choose Terminal. (Admin).
- Use the Ctrl + Shift + 2 key to change Windows Terminal to the Command Prompt profile or click the arrow-down button at the top of the window. You can change the PowerShell profile to the Command Prompt profile using the Windows Terminal App.
- Use the CD command to find the folder containing the ViveTool files. For instance, if you installed ViveTool in C: Vive, type CD C: Vive.
- Press Enter after typing vivetool /enable /id:40347509,41878171,42866187.
- (Try. vivetool /enable /id:38613007 for PowerShell)
A system restart may be needed, and the process is complete. However, to restore the previous state, repeat the process above and replace /enable with /disable in the commands in steps 5 and 6.
Precaution: Unannounced features are frequently incomplete, unstable, or practically useless before enabling them, with the ViveTool app backing up any crucial data. Remember that the best method to keep your system as bug-free as possible is to use stable Windows 11.